Overview
Inside of Hubbe, family applications are managed on a yearly cycle; in-between years there is some work that needs to be done to keep the Applications and Waitlist grid current. This article will teach you proper applications and waitlist maintenance between application years
Written Steps
Step 1: Login as an Admin
- Sign into Hubbe with the Agency Admin Role
- Alternatively, login with the Intake and Eligibility Coordinator role
Step 2: Navigate to the Applications and Waitlist Grid
- From your home page, click the menu item titled Intake, Eligibility, and Enrollment and the submenu titled Applications and Waitlist
- From this page click on the blue Filters text option at the top of the page
- Make sure the filter labeled Application Year is set to the current/previous fiscal year
- Click on the blue Apply filters button
Step 3: Archive any Old Applications
- From our waitlist, we can review and see any possible applications of families from the previous year
- If an application is abandoned, and the family is no longer interested you may also archive this application by clicking on the Status and then clicking the Archive option
Step 4: Move Any Applications to the Next Year
- From our waitlist, we can review and see any possible applications that we may want to move from the previous fiscal year, to the current fiscal year
- If an application is abandoned, and the family is no longer interested you may also archive this application by clicking on the Status and then clicking the Archive option
- If an application is abandoned, and the family is no longer interested you may also archive this application by clicking on the Status and then clicking the Archive option
- For an application we want to carry over to the current year, we will click on the blue Manage button
- Navigate to the tab that is labeled Student Program Info
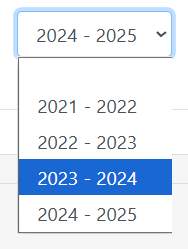
- For the program that is selected, click on the drop-down that is showing the previous program year, and change it to the current program year
Step 5: Change the Default Grid Year to the Current Year
- From our waitlist click on the blue Configure Application button
- Under the tab labeled Field Configuration, click on the pencil icon next to General Application
- Set the Default School Year to the Upcoming/Current School Year
Congrats! You now know how to properly manage your waitlist between application years! For a verbal explanation with visuals, please refer to the tutorial video below.
Tutorial Video
This 8 minute video will also show you how to properly manage your waitlist between application years:
Was this article helpful?
That’s Great!
Thank you for your feedback
Sorry! We couldn't be helpful
Thank you for your feedback
Feedback sent
We appreciate your effort and will try to fix the article