This help article will review how to manually create a student schedule from an individual student's record in Hubbe.
- Navigate to the individual student's record in Hubbe
- From their 'Student Menu' select "Schedules"
- Click on the blue "Create Schedule" button near the top of the page
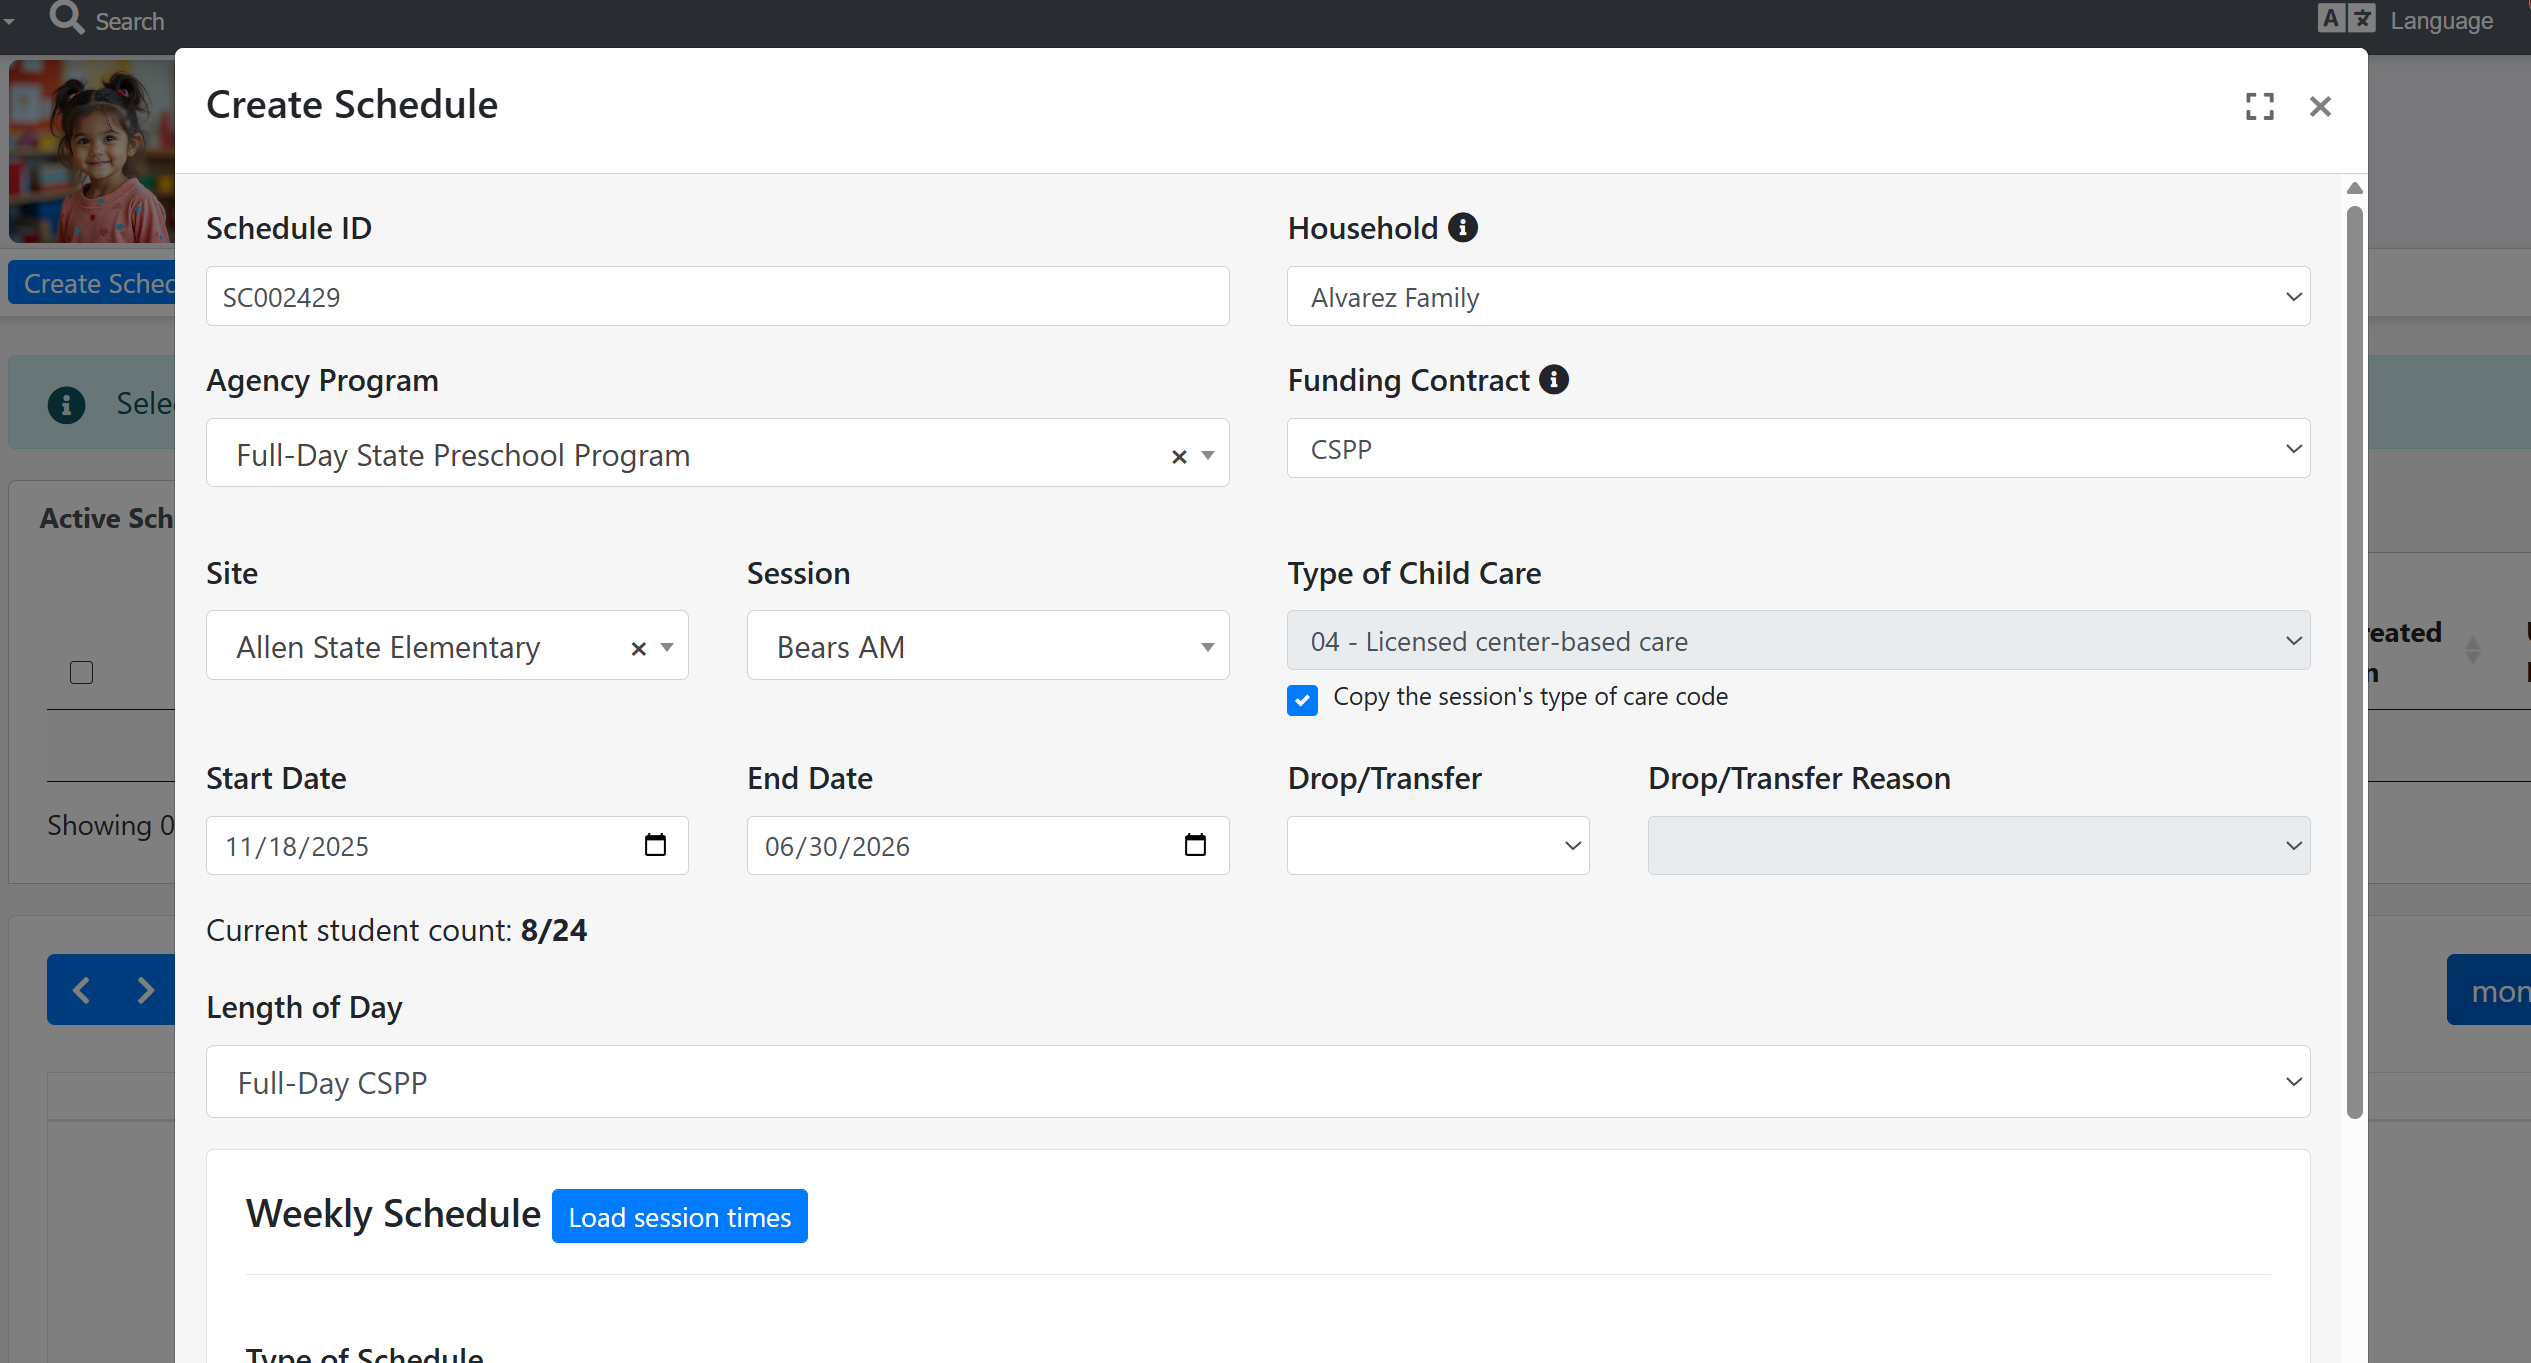
- In the modal that opens, address the fields below
- Schedule ID - This is a system generated random ID, it can be edited, but we recommend keeping it to ensure it is unique
- Household - This will default to the student's household, but if they are assigned to more than one household, you can choose which family to tie this schedule to by selecting them from the dropdown. Whichever family is chosen will be charged any fees associated with the schedule.
- Agency Program - Select the appropriate program from the dropdown (the options present are created at the agency level)
- Funding Contract- The contract options will vary depending on which Agency Program was selected
- Note: If you do not see the correct option, reach out to agency admin to ensure the contract is assigned to the chosen Agency Program
- Note: Whichever contract is selected will determine which fees are able to be assigned to the schedule
- Site - Choose from the sites listed in the dropdown (only active sites will be shown)
- Session- Choose from the sessions listed in the dropdown (only active sessions will be shown)
- Note: If you choose a session that does not have an active Agency Program Calendar assigned to it within the chosen Agency Program, you will be shown a warning message and will not be allowed to finish saving the schedule. In this case, we recommend reaching out to agency admin to help with calendar assignments.
- Note: If the session chosen is over capacity, you will receive a capacity warning. This will not block you from scheduling the student to the classroom, but is meant to help enrollment staff with scheduling logic.
- Type of Child Care - You can choose from the list of options, or select the checkbox "Copy the session's type of care code" to default this field to the code saved on the session chosen. Whichever code is selected will be used on reports for this student's schedule.
- Start Date - Enter the date this child will begin receiving service at this session
- End Date - Enter the date this child will stop receiving service at this session
- Drop/Transfer- Only choose an option if the child is being dropped or transferred from the schedule
- Drop/Transfer Reason - If an option is selected, you will be asked to provide a reason. These are customizable at the agency level.
- Length of Day - Choose a length of day from the list that fits this student's type of service
- Note: If you choose 'Part-Day CSPP' the student will be automatically exempt from all schedule fees
- Weekly Schedule - You can enter the student's daily hours of service within this time table card. The day options will depend on the 'Type of Schedule' chosen, more details below.
- (For Before/After Programs Only) School Day Schedule Type- You will be able to select either, or both, 'Non School Day Schedule' and 'School Day Schedule' as the type of schedule structure for this student
- Non School Day Schedule - This will allow you to enter Start and End times for the day (These days will look to Full Days on your Agency Program Calendar)
- School Day Schedule - This schedule will allow you to enter time for Before School Start, Before School End, After School Start, and After School End (These days will look to K-12 Days on your Agency Program Calendar)
- Type of Schedule- This will default to 'Fixed Schedule,' but can be edited to any of the other options. We will detail them out below:
- Fixed Schedule - You will be able to enter daily times into each day of the week
- Variable by Day - You will be able to enter the student's general start and end times, as well as select the number of hours approved for service each day
- Variable by Week Total - You will ne able to enter the start and end time the child is allowed to attend, along with their weekly hourly cap, and which days of the week they are approved for service
- Drop In - You ill be able to select which days of the week this child can appear for service, if there is room in the class for them
- (For Before/After Programs Only) School Day Schedule Type- You will be able to select either, or both, 'Non School Day Schedule' and 'School Day Schedule' as the type of schedule structure for this student
- Fees - Depending on the Funding Contract selected, you can choose from the fees present in the Fees table. This must be done in order to have a fee appear on the Notice of Action or Fee Plan for the family. If you do not see a fee, please reach out to agency admin to assign active fees to the chosen Funding Contract.
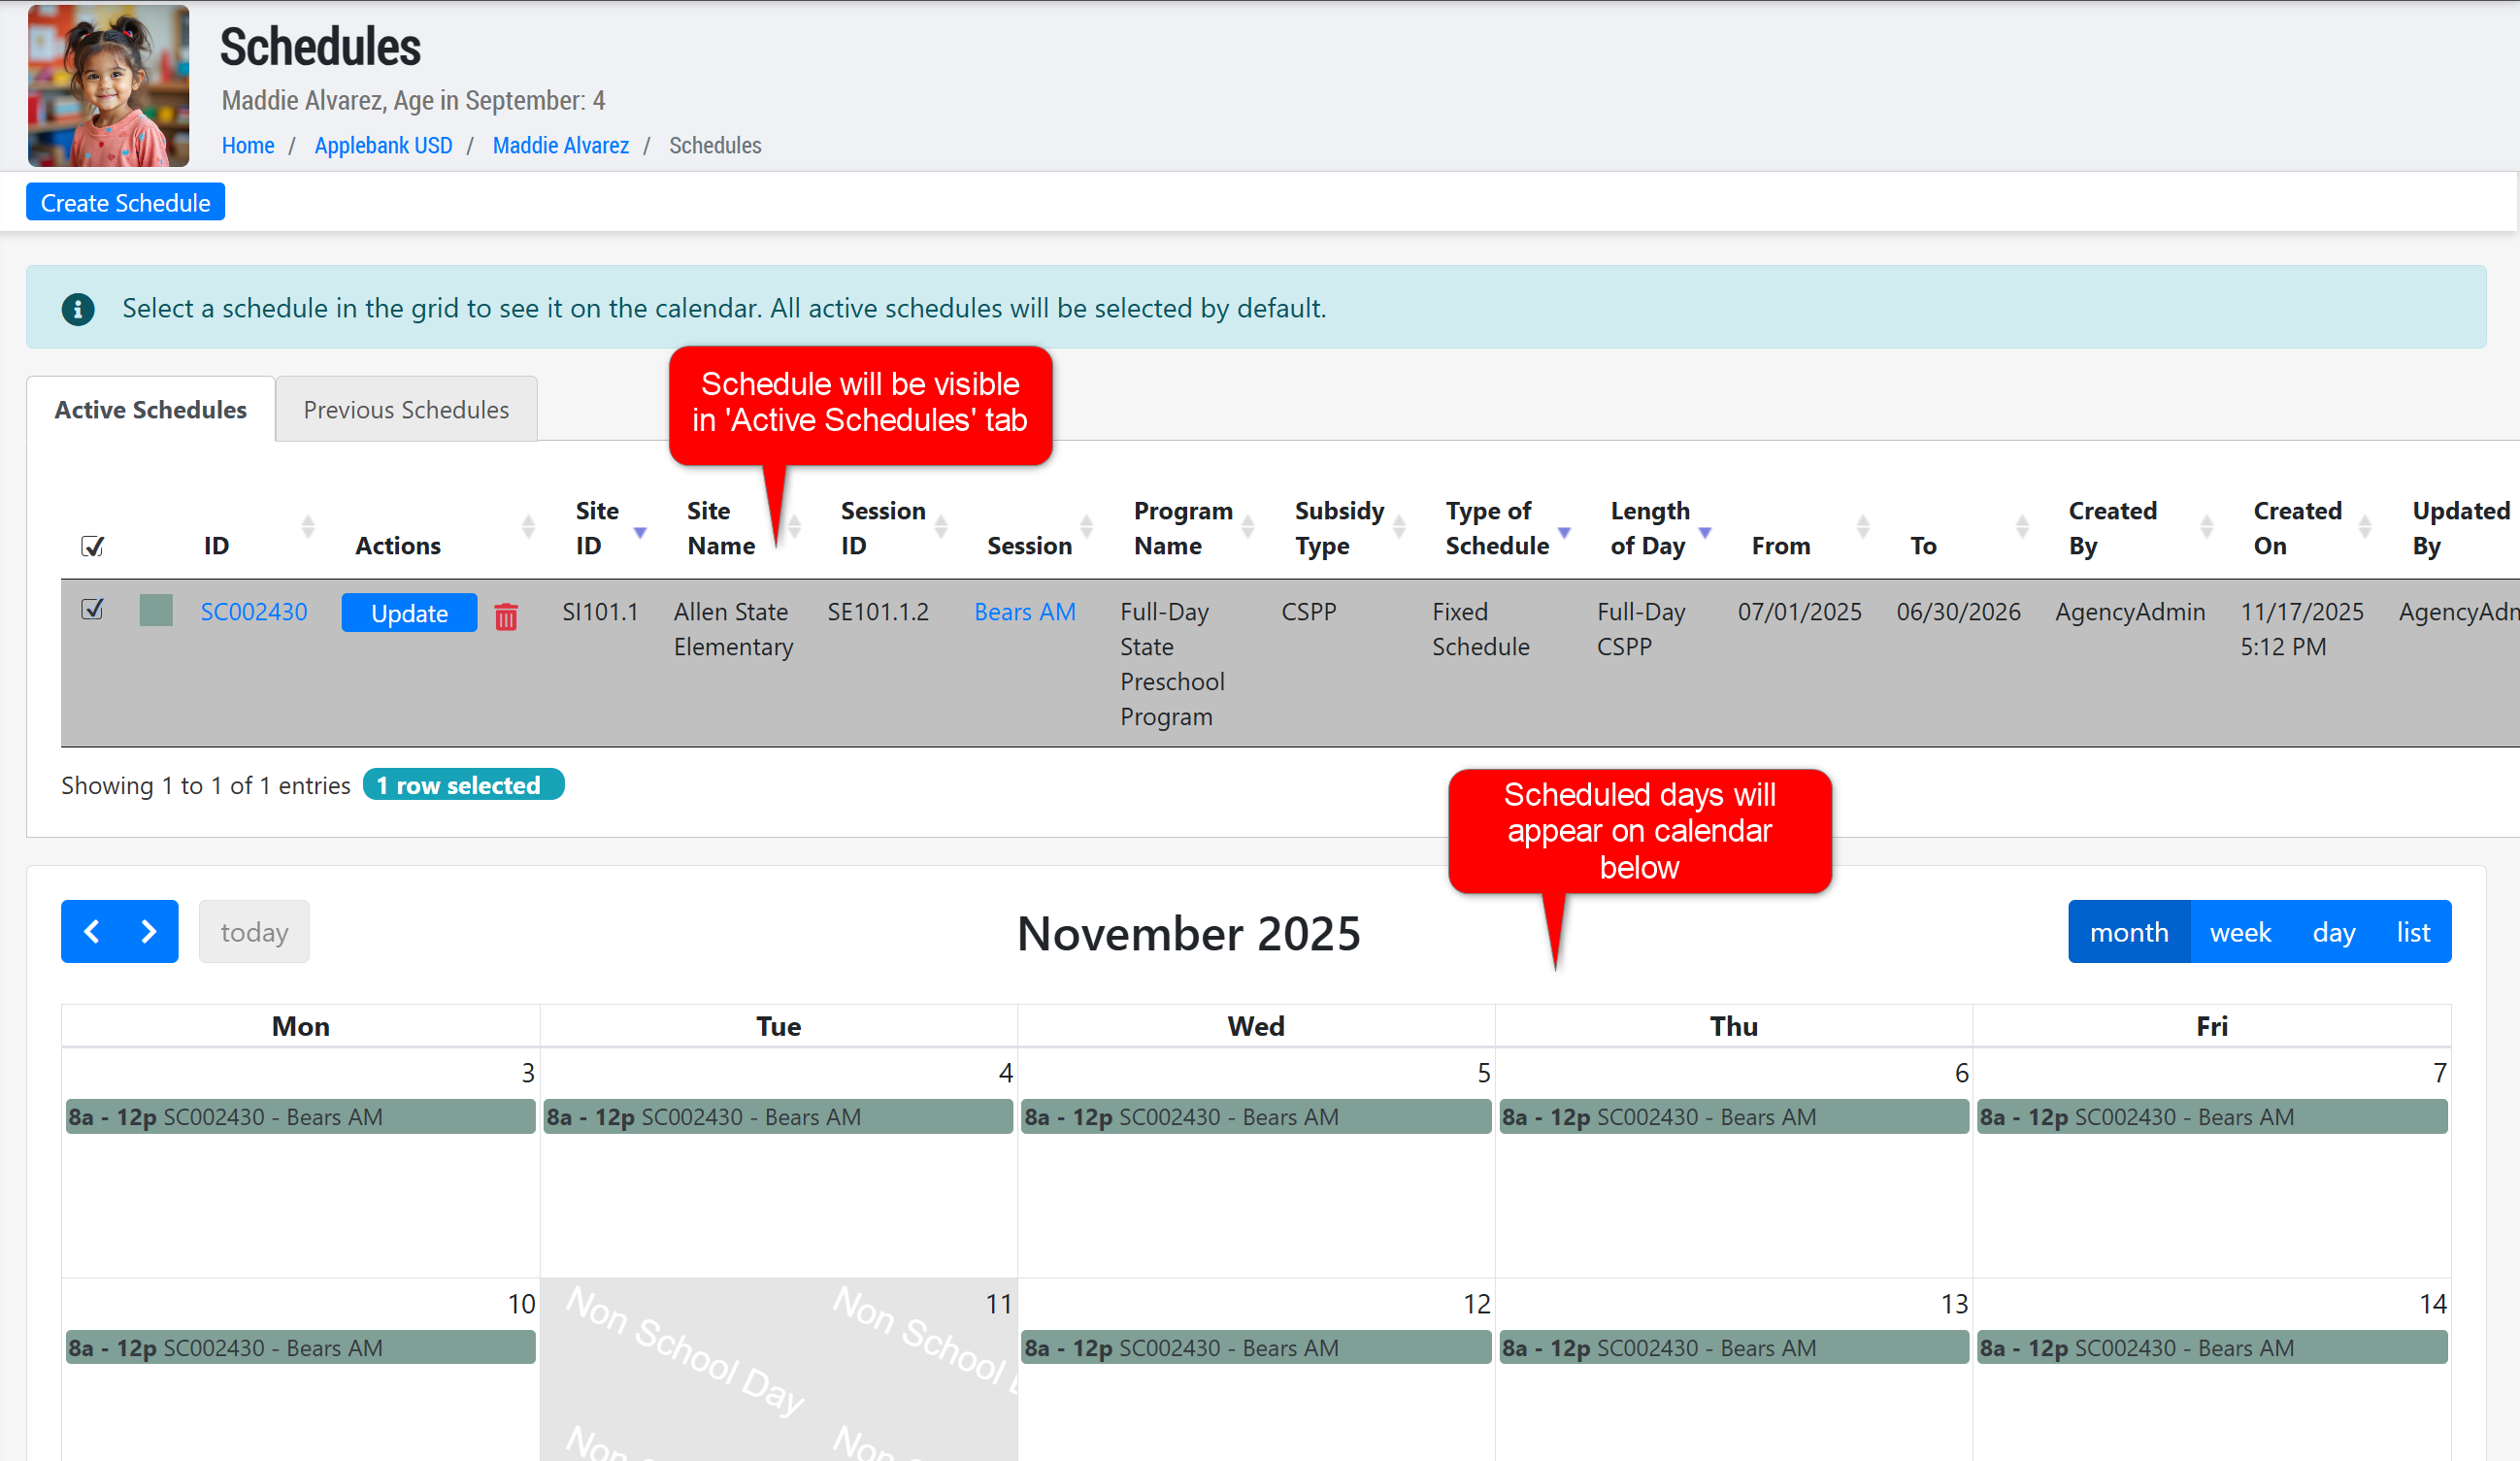
- Once all fields have been addressed, click the blue "Save" button to officially create the schedule
- The schedule will appear on the 'Active Schedules' tab of the schedules table (so long as the Start and End Dates are not in the past) and all scheduled days will appear on the calendar below the schedules table
- If you do not see any scheduled days on the calendar (and the correct schedule is selected on the 'Active Schedules' and 'Previous Schedules' tabs) please ensure the session chosen is assigned to an active Agency program Calendar with the correct operational days selected


Was this article helpful?
That’s Great!
Thank you for your feedback
Sorry! We couldn't be helpful
Thank you for your feedback
Feedback sent
We appreciate your effort and will try to fix the article